Heat transfer (HTV) branding on PU-coated and laminated waterproof panels typically raises unit cost by 2-4% versus a plain panel, and its long-term survival hinges on three parameters: press temperature, film-to-PU adhesion chemistry, and staying off high-flex zones where the film edge peels first. This guide translates those do's and don'ts into a production-ready spec for B2B buyers, using the values our affiliated Quanzhou plant (SGS-verified March 2026, 4,950 sqm, 7 lines, 149 machines) holds on every waterproof stand bag run. For brands that want a fully customized silhouette — structure, dividers, pockets and hardware — our custom golf bag factory team specializes in OEM/ODM programs.
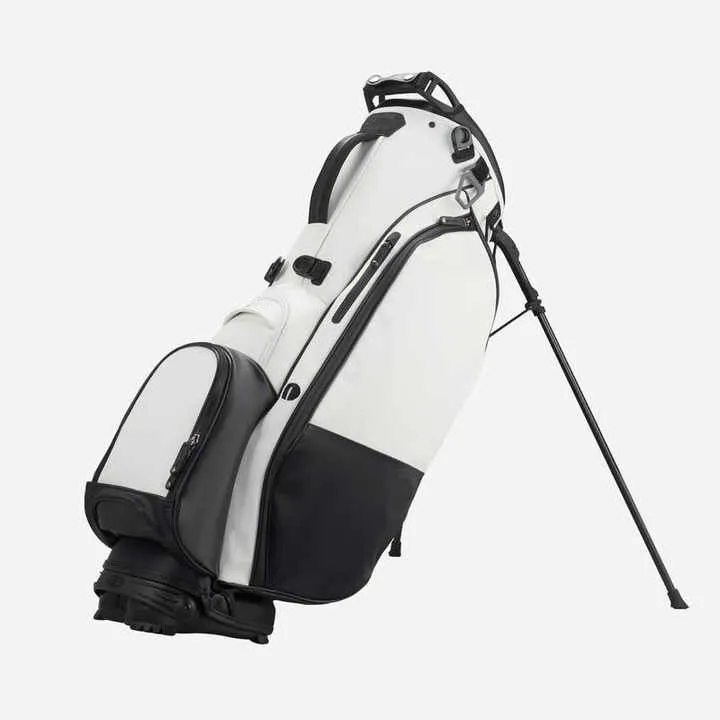
Why Heat Transfer on Waterproof Panels Needs Its Own Rules
A PU-coated or TPU-laminated panel is not the same substrate as plain 600D nylon or polyester. The waterproof layer sits on the top surface, and heat transfer works by melting an adhesive film and bonding it to that surface. On an untreated fabric the adhesive can soak partially into the weave; on a sealed PU or TPU face it must wet out across a slick, non-absorbent skin. If the press time or temperature is too low, the bond is a contact bond rather than a molecular weld, and the label lifts along the edges within the first season. If it is too hot, the PU skin itself can soften, distort, or shear, turning a 6-hour waterproof claim into a leak point around the logo. This is why the same HTV roll that works flawlessly on a 600D shell can fail early on a laminated panel, and why a buyer cannot copy a screen-printed flat-fabric spec onto a waterproof bag and expect the same result.
From a buyer's perspective the practical consequence is that a waterproof-branded stand bag needs two technical files locked before sampling: the panel construction (which laminate, which face fabric, what hydrostatic head) and the heat-transfer program (film grade, temperature window, dwell time, pressure, and placement). At QUANZHOU JUNYUAN BAGS we treat these as one interdependent spec, because a change in laminate thickness moves both the bond window and the final hand-feel of the panel. Get the pair right once, and reorders are repeatable to the locked tolerance.
The other factor few buyers price in is flex and folding. A stand bag's panels bend where the legs deploy and where the bag sits against a tree or cart rail. A waterproof film adds internal stiffness, which concentrates bending stress exactly where an HTV edge sits if placed badly. That is why, in this article, placement rules come second only to adhesion chemistry — a perfect bond in the wrong zone still peels.
What Heat Transfer Logo Actually Adds to Cost and Lead Time
Heat transfer is usually the fastest and most flexible branding route on a stand bag, and on waterproof panels it is often the only clean option that does not pierce the sealed face. A single- or two-color HTV mark typically adds 2-4% to unit cost, which makes it cheaper than embroidery (3-5%) on most programs and cheaper than a molded TPU patch (5-7%) on short runs. The pricing drivers are the film grade, the number of colors, and the placement count — a second placement on the lid adds a second press station rather than just artwork. Because HTV uses a pre-cut film rather than a dedicated mold or a digitizing program, the setup cost is low, and this is why it suits corporate-gift lines, charity-event runs, and seasonal retail programs where the artwork changes between drops.
Lead time is where heat transfer shines most. There is no embroidery digitizing and no mold commissioning, so sampling can be folded into the normal 10-20 day sample window we hold at our affiliated plant, and a bulk run stays inside the 45-60 day standard. For a buyer running a tournament deadline or a gifting season, you can often add a second logo placement late without re-cutting hardware or waiting on an overseas mold. The trade-off is durability ceiling: HTV is not the highest-wear option, which is why we steer buyers who need the logo to survive constant cart-rail contact and course abrasion toward a molded patch or embroidery instead.
Material Basics: PU, TPU Laminate, and Where the Film Bonds
There is a meaningful difference between a PU-coated fabric and a TPU-laminated one, and it affects heat-transfer bonding. PU coating is applied to the back of a woven or knitted face, leaving a printable polyurethane face that reads smooth and slightly rubbery. TPU lamination welds a solid thermoplastic film onto the fabric, giving a higher hydrostatic head and a more uniform surface. Because heat transfer relies on reaching the adhesive's melt temperature, the film's heat-sink behaviour matters: a TPU-laminated panel pulls heat away from the press differently than a thin PU coating, so the dwell seconds that work on one can under- or over-cook the other.
We recommend the buyer specify the face material and the base hydrostatic head in the tech pack before naming an HTV grade. On a panel rated 8,000-15,000 mm hydrostatic head, the logo sits on the sealed face and the bonding plan must avoid disturbing the film's continuity. A full-width sublimation-style wrap is not possible on a coated panel the way it is on plain polyester, so heat transfer and small molded patches are the practical branding routes when you want to keep the panel truly waterproof. Confirm the laminate supplier and reference on the sample, and lock a Pantone (PMS) chip for each film color so a later roll change never shifts the tone.
The Six Do's of Heat Transfer on Waterproof Panels
Six practices consistently separate programs that survive course use from those that peel in the first month. First, test the bond on the actual production fabric, not on a swatch of a different laminate, because adhesion is substrate-specific. Second, specify a press temperature window with a tolerance (typically 150-165 C for standard polyester HTV, adjusted for dwell) and record the actual values on the first article. Third, use a low-tack protective sheet or a silicone pad when pressing over a coated face so the film does not stick to the platen and lift the PU skin. Fourth, allow the press to cool the panel under airflow rather than stacking hot units that can soften an adjacent bond. Fifth, design the artwork with a clear edge margin so the adhesive has a continuous border and no exposed film corners that catch on pockets or straps. Sixth, request a flex-cycle test on the logo panel itself, not just the shell, because the bending zone is where an HTV edge fails earliest.
These do's are buildable into a QC checklist, which matters for a B2B buyer because they turn a subjective "it peeled" complaint into a measurable pass/fail. At our affiliated plant we record press temperature, dwell, pressure, and peel force per run and keep a sealed master unit. That means the second production run is checked against the first, not against memory — which is the level of repeatability a multi-season brand program needs.
The Six Don'ts: Where HTV Peels Fastest
Equally important are the placement and process mistakes that cause early failure. Do not place heat transfer across the stand hinge block or the leg-deployment zone; that area flexes hardest and an HTV edge there delaminates fast. Do not run the label over a seam or a divider rail, where the surface is non-planar and the press cannot apply even pressure. Do not bond directly onto the dual-strap anchor points or the bottom wear plate, which abrade against cart rails and turf. Do not press a high-tack film onto a silicone-infused waterproof surface without a compatibility test, because silicone release and PU adhesion can be chemically antagonistic. Do not assume a single setting works for both a 200D and a 600D laminated panel, since thicker fabrics sink heat differently. And do not skip a wash-and-fold cycle on the prototype, because standing the bag down over and over is the real-world stress an HTV bond must survive.
The common thread is that HTV failures are rarely the film's fault; they come from a substrate or placement mismatch. A buyer who provides a placement diagram with coordinates and a flex-zone map removes most of the guesswork before sampling. When the spec defines both the process window and the zones to avoid, the factory can quote accurately and the sample matches what ships.
Placement Zones That Work vs Zones to Avoid
On a waterproof stand bag the highest-visibility and safest placement is the upper front panel, well above the stand hinge and clear of the wear plate. The top lid is a good second impression zone, provided it is flat enough for even press contact and not crossed by the divider rails. The side panels give a third retail-photo impression and are low-flex, making them a safe HTV home. The dual-strap overlay is possible when the surface is flat, but we keep it to small tonal marks because the strap sees constant pull. The stand hinge block, bottom corners, and any area that folds when the legs deploy are off-limits for HTV; save those zones for a smaller molded patch or embroidery on a strengthened backing if branding must appear there.
Define placements with measurements, not descriptive phrases, in the tech pack. A front-lower-panel logo measured 120 mm from the side seam and 90 mm from the hem reads and repeats far better than "front logo, middle." We ask buyers for a simple diagram or a marked photo, which cuts the sampling loop roughly in half and prevents a beautifully bonded logo from landing in a spot that folds every time the bag stands.
Specification Table for Waterproof HTV Branding
Use this table as the branding section of your waterproof stand-bag spec. Confirm every row on the pre-production sample and lock the values before bulk production.
| Parameter | Typical Spec | Buyer Notes |
|---|---|---|
| Substrate | PU-coated or TPU-laminated panel, 200D/400D face | Confirm laminate supplier and hydrostatic head target. |
| HTV film grade | Waterproof polyester HTV, low-tack | Must be compatible with PU face; run a peel test. |
| Press temperature | 150-165 C with +/-3 C tolerance | Recorded per run on the first article. |
| Dwell / pressure | 8-12 s, moderate pressure + silicone pad | Adjust for laminate heat-sink behaviour. |
| Cost impact | +2-4% vs plain panel | Second placement adds a press station. |
| Flex-cycle target | 5,000+ flex cycles, no edge lift | Test on the logo panel, not just the shell. |
| Placement | Upper front panel, lid, or low-flex side | Avoid hinge block, wear plate, strap anchors. |
| Sampling / bulk | 10-20 days sample; 45-60 days bulk | MOQ 200 pcs, test order 100 pcs. |
How to Brief a Waterproof HTV Program to the Factory
A clear brief is the fastest route to a durable logo. Send the face material and laminate reference, the hydrostatic head target, the artwork as a vector AI/EPS with fonts outlined, a PMS reference for each film color, a placement diagram with coordinates, and the flex-zone map showing where the legs deploy. Tell us the target market and expected MOQ so we can schedule sampling and bulk realistically, and flag the event date if you are running toward a tournament or gifting season. Include reference photos or a tech pack; these remove ambiguity and let us flag a placement conflict before any press time is spent.
Because waterproof structure and branding are intertwined, brief them together. A bag with a removable cooling pocket, a magnetic rangefinder closure, or full-length dividers folds and flexes in specific patterns; knowing the architecture lets us place the logo where the panel stays flat and the bond stays intact. At QUANZHOU JUNYUAN BAGS we handle OEM (your artwork on proven waterproof architectures) and ODM (co-developing the panel spec and structure), and we will recommend HTV versus a small patch when a placement sits near a flex zone so you do not pay for a re-run.
Key Takeaways
- HTV adds 2-4% to unit cost and is the fastest, lowest-setup waterproof branding route.
- Bond chemistry is substrate-specific; always test on the actual PU/TPU panel, not a swatch.
- Place on the flat upper front panel, lid, or low-flex sides; never across the hinge or wear plate.
- Lock press temperature, dwell, pressure, and a flex-cycle target in the QC plan.
- Sampling 10-20 days, bulk 45-60 days, MOQ 200 pcs / test 100 pcs.
Test Plan & Acceptance Criteria
Professional global-brand programs should add measurable pass/fail tests for the logo itself, not just the shell. These criteria turn a durability claim into something an inspection can verify on the line.
- Peel/adhesion test: 90-degree pull with a defined force, no edge lift beyond 2 mm.
- Flex-cycle test: 5,000 cycles on the logo panel, no delamination.
- Wash/abrasion cycle on the logo panel, fade and peel check.
- Placement position check: within +/-3 mm of the drawing coordinates.
- Color check against the PMS-sealed chip under standard lighting.
- Waterproof integrity around the logo: confirm no delamination gap forms a leak path.
Heat Transfer vs Embroidery vs Molded Patch on Waterproof Panels
When a buyer asks which logo method to put on a waterproof stand bag, the honest answer is that it depends on where the logo must survive and how fast the program needs to turn. Heat transfer is the fastest and most cost-flexible route for multi-color or gradient artwork on short runs, and it stays off the needle entirely, which protects the sealed PU face from micro-puncture. Its ceiling is flex durability, so keep it on flat, low-flex panels. Embroidery gives the highest long-term durability on nylon and heavier panels, but every needle puncture can trace a path through a sealed laminate if the backing and needle gauge compromise the film, so on a waterproof bag we dress embroidery with a stabilizing backing and keep it off the pure sealed zones. A molded TPU patch reads premium, layers onto the panel without piercing it, and tolerates flex better than a film edge — but it needs a mold, longer setup, and a higher MOQ to amortize the tooling. In practice, a strong waterproof program often combines two: an HTV hero mark on the flat upper front panel plus a small molded or embroidered accent on the lid or a low-flex side.
Ranking them by effective durability on a waterproof stand bag, embroidery leads on general abrasion, molded patches lead on flex zones, and heat transfer leads on process speed and per-unit cost at modest volume. That ranking is why we ask buyers for the placement map before recommending a method: a logo that lives on the front panel suits HTV, while the same brand mark on the stand hinge block needs a patch or embroidery with reinforcement. Choosing the method after the placement is a far cheaper path than bonding a great-looking film onto a zone that folds every time the legs deploy.
Color, Film Grade, and Fade Control on Coated Panels
Color governance matters more on a waterproof panel than on plain fabric, because the sealed surface reflects light differently and a bright brand color can read duller or more saturated than the artwork suggests. The fix is to lock each film color to a PMS reference and approve a physical chip on the actual laminate before bulk, not to judge from a screen. We also watch fade: a UV-stabilised HTV film on a TPU panel should hold its tone through the course's sun exposure, and we run a light-exposure check against the sealed chip with a delta-E limit. If your program includes a distinctive brand color or a two-tone gradient, ask for a colour-proof on the production laminate so the manufacturer reproduces the exact lockup rather than an approximation.
Film grade is another variable that changes the outcome. Cheaper generic HTV may bond acceptably on flat fabric but lack the adhesive wetting needed for a slick PU face, and it can yellow or edge-lift faster under sun and flex. We steer buyers toward a waterproof HTV grade with a low-tack, optically-optimised film and a documented press window. Because a coated panel is a premium surface, the small per-meter uplift on a better-grade film is worth it — it is the difference between a logo that still looks crisp in the second season and one that needs replacing after three months.
Recommended Internal Links
- Products (Stand Bag Architectures)
- Waterproof Stand Bag Range
- OEM/ODM Service
- Factory & QC
- Golf Stand Bag Buying Guide
- Custom Logo Ideas for Stand Bags
FAQ
Is heat transfer durable on a waterproof golf stand bag?
Yes, when the film is bonded to the actual PU/TPU panel at the correct temperature and placed off the flex zones. On waterproof panels HTV is often preferred over embroidery because it does not pierce the sealed face. Expect 2-4% unit cost and a flex-cycle test to lock durability.
What temperature is used for heat transfer on PU panels?
We typically press standard polyester HTV at 150-165 C with an 8-12 second dwell on a PU/TPU panel, using a silicone pad. The exact window depends on the laminate's heat-sink behaviour, which is why we record temperature and dwell per run and issue a first-article record.
Where should you not put a heat transfer logo on a stand bag?
Avoid the stand hinge block, the leg-deployment zone, the bottom wear plate, and the dual-strap anchor points, because those areas flex and abrade the most and an HTV edge there peels first. Place the mark on the flat upper front panel, the lid, or a low-flex side panel.
Why does heat transfer peel off waterproof fabric?
Peeling is almost always a bonding or placement issue: too-low temperature creates a contact bond, a non-compatible film cannot wet the sealed PU face, or the logo sits in a flex zone that delaminates with bending. Testing on the actual panel and running a flex-cycle check prevent it.
How much does a heat transfer logo add to a golf stand bag?
A single- or two-color HTV logo typically adds 2-4% to unit cost. It is generally cheaper than embroidery and molded patches on short runs because there is no digitizing or mold setup. A second placement adds a press station, which is the main extra cost.
Can you combine heat transfer with a waterproof panel?
Yes. Small HTV marks and molded patches are the cleanest branding routes on a sealed waterproof panel because they do not pierce the film. Confirm the bond on the production laminate, keep the mark flat, and verify waterproof integrity around the logo.
What is the MOQ and lead time for a heat-transfer brand run?
Our standard MOQ is 200 pcs with a 100 pcs test order. Sampling typically runs 10-20 days and bulk production 45-60 days. Provide your artwork and placement diagram to speed the sample loop.
Request a B2B quote for golf stand bags
Send your target market, expected MOQ, and reference photos. We respond within 24 hours with a sampling plan.